Update Error Code 0x80004005: In the 21st century, so as to provide overall stability as well as protection to the working of the Windows Operating System and due to its constant changes so as to meet the various technical demands, Microsoft undergoes regular updates so that it can successfully provide extensive support to all the regular changes that it undergoes.
At the present moment, the number of Windows updates have been introduced to such an extent that it can provide support to all the well-known versions working under this system, that is, Windows 7,8,8.1 and also 10.
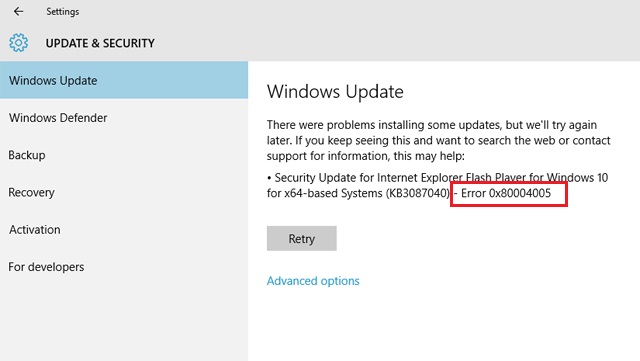
But in spite of such newly found updates which have privy immense speed and other conveniences to the fullest extent, they may sometimes disappoint users by failing to get downloaded in the proper way and during such situations, the system may often show an error code, that is, 0x80004005 which is extremely common nowadays. This Error Code is very similar to 0x8007000D.
Read Also:
How to Fix Error Code 0x80004005 in Windows 10
When 0x80004005 error appears on the screen, sometimes it can be easily resolved by merely restarting the system. But there have also been such cases where restarting has not proven itself to be the ultimate solution for such a problem. For such situations, we have been provided with six excellent ways which can help us to get rid of error 0x80004005 as quickly as possible.
Method 1 – Problems in Activation
In order to use this particular method, one must be careful enough to check whether the Windows have been activated completely or not. It is only after doing so one should start following the given steps in serial order as have been given below-
Step 1: Click on the start button.
Step 2: Go to Settings. Then select the option which says Update and Security.
Step 3: Right after that, press on the button saying Activation.
Step 4: Then, on a final note, select the Troubleshoot button so as to successfully ensure the Running of the Activation Troubleshooter.
It is only after following the above-mentioned steps, one should then finally check if the error has been taken care of or not and if it does not help, then one can opt for the methods that have been enlisted below.
Method 2 – Issues with Driver
In many such situations where 0x80004005 error has been quite a prevalent problem affecting the particular system, it may also result due to the action of certain device drivers which can pose as an ultimate threat to the system and thus prevent it the process of the Windows getting updated and also restricting another kind of updates. In order to get over with this problem, one should opt for the following given steps:
Step 1: Select and open the Control Panel.
Step 2: Then open the option which says, Device Manager.
Step 3: The Device Manager will lead to a space containing a number of options out of which one needs to select the one which says Unknown Device. Otherwise one can also select the option which is seen to have a kind of yellow triangular shape on it.
Step 4: Once the device which has been damaged has been successfully identified, one should search on the web for getting hold of an updated version of the same. Upon finding so, one should install it right away so as to get all started with a successful workflow system.
This may not be a permanent solution for such kind of an error restricting the process of advanced updates on the system but it can definitely prevent any kind of reinstallation of any such driver updates which can ultimately help one to concentrate only on fixing the required ones by successfully hiding these constant interruptions.
Method 3 – Use the Windows Update Troubleshooter
When the problem lies within the Windows Update and it’s working, in such a scenario the above two problems might not be sufficient enough in order to get rid of the same.
So, for such a situation, one can effectively opt for using one such option which is known as the Windows Update Troubleshooter. For doing so, the individual has to follow the given steps in the serialized order. That is –
Step 1: Firstly, select the Windows option so as to type and search for the option Troubleshooter after pressing Enter.
Step 2: After doing so, the windows which appear on the screen, it is from there that one should select the option called View All which is present in the left panel. It is from here that one can then easily find the required option, that is, the Windows Update Troubleshooter. After finding this option, one should Run it immediately.
Step 3: This should be followed by selecting the Advanced button. While doing so, one should be absolutely confident about the fact that the Apply option is repaired automatically so as to ensure the Checkbox is enabled easily. It is only after checking on to this that one should press on the option which says Run which serves as the Administrator.
Step 4: Finally, one can then click on the Next button which then leads one to the page which contains a number of instructions to be followed. It is only after that step, one can find that the troubleshooting process is successfully completed.
Once all the steps are successfully carried out, all the required Updates can undergo complete and successful installation and thereby, the problem of the Error Code 0x80004005 can be resolved as a whole.
Method 4 – Manually Force Windows Update Restore
This is another effective method which can be used in order to get rid of the error 0x80004005 and it is possible by doing so if one can follow the given steps in the exact way that have been mentioned below. They are as follows-
Step 1: First of all, one should begin by pressing the Windows as well as the X keys in a simultaneous order.
Step 2: By pressing both the above-mentioned keys simultaneously, it will lead to a number of options arising on the screen out of which one should select the one which says Command Prompt (Admin). After doing so, generally a User Account Control pop up should be appearing on the screen from where one should promptly click on the Yes button.
Step 3: After that, one should start typing a number of commands. After typing each of these commands, one should always press the Enter button.
net stop wuauserv
net stop bits
net stop cryptsvc
ren %systemroot%\System32\Catroot2 Catroot2.old
ren %systemroot%\SoftwareDistribution SoftwareDistribution.old
net start wuauserv
net start bits
net start cryptsvc
It is only after successfully running all the above-mentioned commands, one can then close the option which says Command Prompt. Thus this method can help to get rid of the mentioned error.
Method 5 – Using the SFC Tool To Check For Corrupted File
We may often come across a system file format called the opencl.dll and such a file may be corrupted which may in a way lead to all the problems due which the successful Windows Updates might not take place. Such updates also include the Anniversary ones which might not cause major damage to the system but can ultimately make it’s way to the 0x80004005 error.
In order to avoid such a circumstance, one should always keep a check on whether the file they are about to use is a corrupted one or not and this should be done beforehand. For checking any kind of file corruption, one can use the tool which says the System File Checker by following the given steps-
Step 1: Firstly, one should press the Windows as well as the X keys simultaneously.
Step 2: Then choose the Command Prompt (Admin).
Step 3: After doing so, type Sfc/scannnow. After typing the given command, press Enter.
The process of the entire scanning may take around twenty minutes for its completion. Once it’s done successfully, one can easily spot the given message on the screen which will be saying “Windows Research Protection did not find any integrity violations”.
If not the above procedure, then one can also check whether a particular file is corrupted or not by checking the %windir%\logs\cbs\cbs.log file.
Method 6 – Using the DISM Tool To Check For Corrupted Files
One can easily detect whether a particular file that they are about to use, is corrupted or not by using the DISM tool which actually stands for the Development Image Servicing and Management Tool. By following the given steps, one can make use out of this super convenient Tool for checking any kind of file corruption. The steps to be followed are –
Step 1: One should begin by pressing the Windows and the X keys simultaneously.
Step 2: Then, go ahead by selecting the Command Prompt (Admin) option.
Step 3: After that, one can then finally type the DISM/Online/Cleanup-Image/Restore Health. Then press the Enter key.
After the entire scanning process is absolutely complete, one can check either from the
C:\Windows\Logs\DISM.log
or
%windir%\logs\cbs\cbs.log
If one receives any lines at the end of it, it is this which immediately helps one to understand that in such a case the opencl.dll file is actually a corrupted one.
Method 7 – Repair the Opencl.dll File Manually
This can be done easily by following the given steps in the serialized order.
Step 1: Begin the process by downloading the tool named Media Creation.
Step 2: After successfully downloading the above-mentioned tool, it should be placed in a temporary kind of a folder after which one can extract this particular file to that of the c:\temp\windows folder. This Media Creation tool can also be used for downloading the Windows 10 Pro ISO.
Step 3: Then, one should convert them install.esd file to the file which says install.wim which is done by typing the given command that is:
DISM/Export-Image/SourceImageFile:c:\temp\windows\sources\install.esd/SourceIndex:1/DestinatiomImageFile:c:\temp\windows\sources\install.wim/compress:max
Step 4: Afterwards, one should process and generate the index as well as the windows version of that particular WIM image. Then, one can use the given command that is
DISM/Get-WimInfo/wimFile:c:\temp\Windows\sources\install.wim
Step 5: On a final note, one can then easily get those particular corrupted files restored from the given WIM image. After that, one should type:
DISM/Online/Cleanup-Image/RestoreHealth/Source:wim:c:\temp\Windows\sources\install.wim:1/LimitAccess
Step 6: After successfully carrying out the above-mentioned steps, the user can then be assured enough to reboot their system after which the sfc/scannow can be easily rerun so as to help one to repair as well as check if there are any other corrupted files or not. It is finally then when the problem regarding the Error Code 0x80004005 can finally be resolved.
Also Read:
Conclusion
The problem faced by a particular system due to this kind of error is quite a common issue nowadays. But as days have gone by more and more such effective solutions have been introduced to mankind which has taken care of the Error Code 0x80004005 and helped in the successful running of the various nee Windows Updates.