When there is a problem with the CPU’s hardware, the CPU receives an interrupt from the system. It has the appearance of an OS process, but it is not. Because System Interrupts can consume a large amount of CPU, this could be an issue.
Rather than a malicious programme or virus, this is an alarm to the computer’s processing system concerning hardware issues. In most cases, System Interrupts can be found in the System32 subdirectory.
This article explains what interrupts are and how to fix high CPU and disc utilisation caused by interrupts.
What Are System Interruptions?
A component of the Windows operating system, System Interrupts acts as a bridge between hardware and the processor. The CPU is alerted if there are any problems with the system’s hardware.
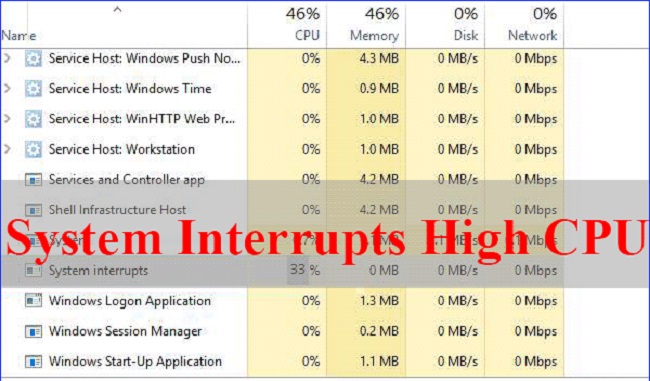
Using the Task Manager, you’ll see it running as a separate process. System Interrupts are sent to the CPU if there is a problem with the hardware. The CPU then goes to work resolving the problem. Work is resumed after the project is completed and the error is corrected.
The issue emerges, though, when these interruptions are frequent and cause your CPU to overwork (Central Processing Unit). System interrupts should never be disabled or deactivated.
You run the risk of doing irreparable damage to your system if you do something like this. When a system has hardware interrupts, it is able to run efficiently and simultaneously do multiple tasks.
Hundreds of programmes run in parallel on a computer system. Whenever a problem arises, Interrupts sends an alarm to the CPU and halts all other activities. Because the CPU has saved all of the previous actions, there will be no data loss as a result of this.
Read Also:
Troubleshoot System Interrupts High CPU in Windows 10
Despite the fact that your device requires System Interrupts, the normal rate is less than 3 percent. If the rate rises by 20% or more, your computer may have issues.
Hardware or driver difficulties may be the cause of the issue. In some cases, rebooting your computer may be all that is needed to fix the problem. If the System Interrupts High CPU problem reappears after a restart, try that as a last resort.
Some problems are more complicated and you may notice a significant CPU utilisation. Even in these circumstances, it is difficult to pinpoint which piece of hardware is causing the issue. As a result, it may take some time and patience to solve the problem.
Many solutions exist for dealing with System Interrupts High CPU. System Interrupts can be fixed using the following methods, which are ranked in order of difficulty:
1. Troubleshooting the Device and Driver
It’s reasonable to suspect that the problem could be caused by outdated or corrupted drivers. System Interrupts and High CPU are caused by a wide range of issues, including corrupted drivers and devices.
In the event that none of the above methods work, you must determine which driver is causing the problem. External devices should be disconnected first, before moving on to internal ones. During the procedure, make sure to update each driver.
The first step is to disconnect all external devices from your computer, including the keyboard, mouse, external Bluetooth, and WiFi devices, as well as the operating system.
Check the CPU use for a few minutes after disconnecting a device. If the user doesn’t change, disconnect all of the devices again. CPU use drops by 2 to 3 percent, which indicates that this is the device that’s to blame.
2. Disconnect Your Internal Devices
Step 1: Press Windows + R, type “MSC,” and then press Enter to begin. Select and disable devices like sound cards and network adapters in the device manager one by one. To identify malfunctioning software, check if the CPU use drops by more than 20%.
Step 2: After completing the aforementioned steps, you must update all of your system’s device drivers. Using the device’s right-click context menu, pick “Update device driver,” and then click on “Browse my computer for driver software.”
While delivering data, your network adapter has the ability to wake up your computer system. “Wake on Magic Packet” is the name given to this data packet.
Using a lot of CPU power and sending out a lot of interruptions, this data packet can result in serious system troubles. By altering your system’s settings, you can disable Wake on Magic Packet to see if this fixes the problem.
Step 1: Open Run by pressing Windows + R. Enter “MSC” into the resulting dialogue box and press the Enter key.
Step 2: In the device manager, pick Network Adapters from the drop-down list to see all the devices connected to your system.
Step 3: Right-click on your WiFi device and select Properties.
The Advanced tab is where you’ll find it. Look for “Wake on Magic Packet” among the settings.
Step 5: Disable the property by clicking on Wake on Magic Packet. Lastly, click the “Save” button and exit the page. Afterwards, restart your computer and see if the problem has been fixed.
3. Installing Intel Rapid Storage Technology
Devices that use SATA drives for desktop, mobile, and server platforms benefit from Intel Rapid Storage Technology, which enhances performance and responsiveness.
It is a Windows-based tool that improves system performance by minimising power consumption. If you use numerous drives, you won’t have to worry about data loss in the event of a disc failure or damage.
Some customers have had success reducing CPU use by using Intel Rapid Storage Technology. Installing this is therefore a viable alternative, if only to see if it resolves the issue.
First, be aware that the SATA controller driver on your PC will be replaced by this module. The set-up procedure is straightforward and may be completed in a few short steps. Installing the module from Intel’s official website is an option if you’re comfortable doing it yourself.
4. Disable Fast Startup
A distinctive feature of Windows 10 is the ability to speed up startup time once the system has been completely shut down. Hibernation or sleep mode can cause compatibility issues with parts that don’t support hibernation or sleep mode.
Earlier versions of Windows had a feature called “cold shutdown” and a “hybrid sleep mode.” When you shut down the computer, Windows is in the same state as it is when it is running.
The system logs out all users and shuts down all programmes in either of these states. However, the system session will be operating, and the kernel will be loaded up, when the device is booted up.
A hibernation notification is then sent by Windows, and the system goes into hibernation and preserves the current state before being shut down completely.
It is unnecessary to reload the kernel, drivers, or system state when Windows is restarted. As an alternative, it might simply refresh your system’s RAM (Random Access Memory) and bring you back to the start-up menu.
People have reported that after removing this feature, their CPU usage has decreased. Disabling this function will help you see if the problem goes away. Disable rapid startup by following the instructions below:
Step 1: To begin, press Windows + R to bring up the Run menu. Enter “Control Panel” into the resulting dialogue box and hit Enter. The system control panel will now be accessible. In the second step, go to the control panel and select Power Options.
Step 2: Select “Choose what the power buttons do” from the left side of the screen. To enable administrator rights, select “Change Settings that are currently unavailable” from the drop-down menu.
Step 3: Uncheck the “Turn on rapid startup” option under Shut down options. Don’t forget to save your work when you’re done!
System restart and check if the problem persists with the System Interrupts High CPU issue
5. Disable USB Root Hub
The USB Root Hub is a piece of software, not a piece of hardware. USB peripherals can be connected to your computer using this programme. Many USB Root Hubs are built into nearly every device, allowing you to share the data bus with other computers.
Your computer’s system may be disrupted by USB hardware. The problem can be resolved by turning off USB Root Hubs in your device manager. Determine which root hubs your keyboard and mouse are using in order to disable the USB root hub that they are not currently using.
As a result, your first step should be to identify the root hubs that the external devices require and then deactivate the rest. The following are the steps to complete this procedure:
Step 1: Start by pressing Windows + R, typing msc, and pressing Enter on the keyboard. Expand the dialogue box by clicking on the Universal Bus Controllers. Go through each of the root hubs in turn. Properties may be accessed by right-clicking on a root hub.
Step 2: Select the tab named Power in Properties and check to verify if your external devices are connected. This list would include your keyboard and mouse if they were connected to the root hub. If your devices appear in the “Attached devices” section, they’re connected to this root hub and are therefore mentioned there. There are no other root hubs you need to worry about deactivating.
Next, right-click all USB Root Hubs except those that are used by your keyboard and mouse (see Step 5 above). Disable is the next step.
Step 3: Restart your computer to see if the problem persists. If the issue persists, then the USB Root Hubs were not the source of the problem. If this happens, re-enabling the root hubs will undo all of the changes.
6. Disabling Audio Enhancements
To enhance the sound quality, certain sound drivers include intensifiers. Trying to improve their audio system, they apply properties that the system would not be able to adapt. System Interrupts might occur as a result of excessive CPU consumption.
In the meanwhile, you can disable the sound enhancements to see if that helps. Some sound drivers don’t support this feature. The Enhancements tab can be renamed in some cases. Because of this, it is best to turn off all audio effects in these situations.
Because it allows other programmes to control your sound card, the “Exclusive mode” available in some audio drivers causes issues. While it’s possible this won’t make a difference, it’s preferable to give it a shot.
Step 1: To open Run, press Windows + R. When a dialogue box appears, type Control Panel and press Enter. Type sound into the top-of-the-screen search bar to get the sound options.
Step 2: Select the audio device connected to your PC from the list that appears once the Sound Options window has been opened. Open Properties by right-clicking and selecting Properties.
Read Also:
Conclusion
When there is a problem with the hardware that is connected to the system, the system will be interrupted. Even though these interrupts are essential to the system’s operation, they become a problem if they cause the CPU to overheat and crash.
With the help of this article, you’ll learn how to fix System Interrupts’s excessively high CPU consumption. I hope this information is useful to you.