Nvidia designs graphics processing units that power the fastest laptops for gamers and creators. These are used for competitive gaming, professional visualization, and cryptocurrency mining. It is observed that many Nvidia graphic card users have reported Nvidia Control Panel not showing up.
The Control Panel provides control of Nvidia graphics driver settings and other utilities supported by Nvidia which you might have installed on your system.
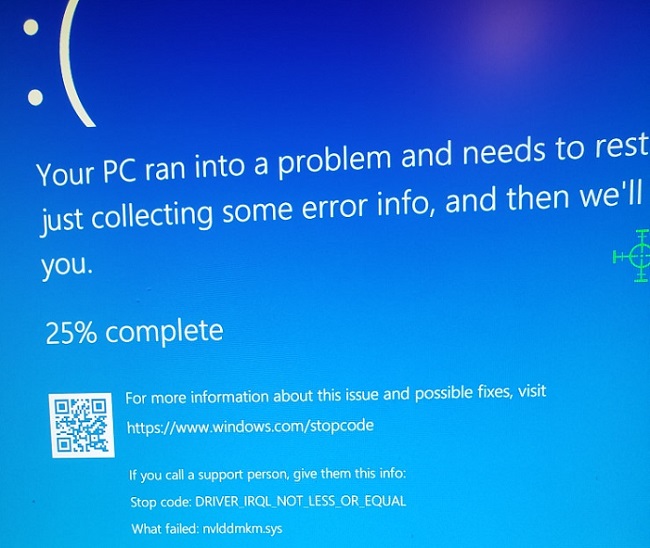
There are many causes for the occurrence of this error like there may be something wrong with your graphic card driver, in other words, you have an out-of-date driver, corrupted driver files, or there can be a compatibility issue between the graphic card and Windows. Moreover, there can also be a possibility that Nvidia Control Panel itself is corrupt.
So, even you face this problem of Nvidia Control Panel Missing, this guide provides you with a number of fixes for Windows 10. Give it a try and you will be all set.
How to Fix Nvidia Control Panel Missing
The following troubleshooting tips listed in this guide are both basic and advanced steps. It is recommended to go for advanced steps if basic ones do not work for you.
1. Restart Nvidia Services
There are a number of services that are constantly running on your computer to keep various applications and features running. Furthermore, sometimes it might happen that Nvidia Control Panel went missing from both the Desktop context menu and System Tray.
So, in these scenarios, it is required to restart your Nvidia services. Hence, follow the given steps for restarting Nvidia services.
Step 1: Press Windows+R simultaneously in order to open the Run box. Then, type services. msc in the Run box and hit Enter button.
Step 2: Above step will open the Services window. This window has a record of every running service on your computer. In this listing search for the service named Nvidia. Now, select Nvidia service and press the Restart button which is present on the left side of the screen.
Step 3: If the service is not responding, right-click and click on Start.
Step 4: If this cannot start Nvidia Display Container by giving an error message then, follow the below steps.
- Firstly, right-click on the Start button. Now, open Device Manager by clicking on it.
- Secondly, expand Display Adaptors.
- After that, right-click and uninstall Nvidia Driver.
- Finally, restart your PC.
Step 5: After following the above steps look for Nvidia Control Panel. Did this method solve your issue? If not restart your computer again. If there is no luck then go for other methods mentioned in this guide.
2. Manually Launch Nvidia Control Panel
You can also force Nvidia Control Panel to show up by opening it manually. This can be done until you find a permanent solution for this issue.
Step 1: Open My Computer or This PC. Then, hop inside C Drive. After that, go to the Program Files folder. In the Program Files folder, search for the Nvidia corporation folder. If you fail to find the Nvidia corporation folder then, look for this folder inside Program Files (x86) folder.
Step 2: Once you reach inside the Nvidia Corporation folder, then open the Control Panel Client. Now, search for nvcplui file.
Step 3: After the above procedure, right-click on the nvcplui file and click on the Run as administrator option.
Step 4: By right-clicking on nvcplui you can create a shortcut of the Nvidia Control Panel.
3. Reinstall Nvidia Control Panel App from Microsoft store
Following are the steps which need to be followed carefully in order to install Nvidia Control Panel App again from the Microsoft store
Step 1: Begin by clicking on Start After that, click on Settings which is present below File Explorer.
Step 2: Now, you are inside Settings. So click on Apps
Step 3: Then, click on Apps & Features from the left menu.
Step 4: Followed by, searching for Nvidia Control Panel in the search box.
Step 5: Look carefully for Nvidia Control Panel, if it is already present on your system then uninstall it.
Step 6: Lastly, go to link for installing Nvidia Control Panel from the Microsoft store.
4. Unhide Nvidia Control Panel
It is observed that NVIDIA Control Panel is hidden by mistake, causing it to go missing from your Desktop Context menu and system tray. Commonly this is observed when you update the Nvidia graphic card software.
Let’s take a look to follow steps to unhide the Control Panel
Step 1: let’s begin by pressing Windows+R simultaneously. This will open your Run box. Now, search for Control Panel by typing Control.
Step 2: After opening the Control Panel, view the options by Large Icons, then select Nvidia Control Panel option by double-clicking on it.
Step 3: After this step, you are almost done. Finally, look for the Desktop or View menu, click on it, after that choose the Add Desktop Context option from the drop-down menu.
After performing the above steps go to your computer’s Desktop and search if Nvidia Control Panel appears in the Desktop context menu or not.
5. Permanent Solution to Nvidia Control Panel Missing by Nvidia Support
The above four methods are effective in solving the missing Nvidia Control Panel. But some users are not satisfied with those methods. Since it keeps appearing on their screen again and again. Therefore, to overcome this problem Nvidia support provided a permanent solution to this issue.
Let’s follow the steps given below in order to vanish this problem from its root.
Step 1: Firstly, open My Computer or This PC based on your Windows version. Then go to C Drive. Inside C Drive opt for the Program Files(x86). Furthermore, go to Nvidia Corporation followed by Display.NvContainer.
Note: Do not worry if you are unable to find the Nvidia folder in Program Files(x86). You can surely find that folder in the Program Files folder.
Step 2: When you reach inside Display.NvContainer folder, you will locate a file named Display.NvContainer. Give it a right-click and choose the option to copy.
Step 3: After that, click Windows+R keys together to open the Run box. Moreover, to open Startup Folder type shell:startup command in Run box. Then press Enter.
Step 4: The above step will open a Startup folder for you. Inside this folder right click and Paste the content which you have copies from Display.NvContainer file.
Step 5: Now, select the Properties option for the Display.NvContainer file you pasted in Startup file. You can do this by right-clicking on Display.NvContainer file.
Step 6: Finally, in order to complete this procedure, you need to apply settings. So, for that in the Properties window go to the Compatibility tab. There you will get an option in the form of a check box for Run this program as administrator. Tick that option. Then at last press Ok to apply these settings.
After following the above steps with proper care, restart your computer. Check if you found missing Nvidia Control Panel back on the System tray or desktop context.
6. Update Nvidia Graphics Driver
Nvidia Graphics Driver update is required whenever there is an issue with the driver. In the case of driver failure above mentioned five methods will not work. So, it becomes necessary to update Nvidia Graphic Driver.
Following are the steps to follow to fix the missing Nvidia Control Panel in Windows 10.
Step 1: Click Windows+X together in order to open the Win + X menu. This menu will give access to the Device Manager option.
Step 2: Secondly, look for the Display adapters option inside Device Manager. Then, expand Display adapters to find Nvidia graphics. Right-click on driver and press the Update driver option.
Step 3: Above step will open a new window. In this window click on Search automatically for the updated driver software option. This option will let you know if there is any new update or not. It will update your system automatically if there is any new update. However, it also notifies if there is no update available.
If updating a driver didn’t work for you then go for reinstalling the driver.
7. Reinstall Nvidia Graphic Driver
The majority of users get success when they reinstall Nvidia Graphic Driver. So, don’t worry even you are still struggling to solve Nvidia Control Panel missing problem.
Here are some steps you should follow to reinstall your Nvidia Graphic Driver successfully.
Step 1: This is the step with which you become very familiar. Firstly, press Windows+X simultaneously to open Device Manager. Then, select Device Manager appearing in the list on your screen.
Step 2: Now, expand the Display adapters option from the list drivers. Right-click on the Nvidia Graphic Card driver and go for Uninstall device option.
Step 3: After removing (Uninstalling) the driver, hop to Nvidia – Download Drivers webpage. There you will find different choices to select from. You will be provided with options like Product Type, Product Series, and other Product options. Make a wise decision among these.
Step 4: Moreover, it is advisable to choose these options according to your computer’s configuration. Then, download the latest driver. Once all the steps of downloading are achieved successfully install the driver on your PC.
Step 5: Lastly, restart your system in order to verify if your Nvidia Control Panel works successfully or not.
Conclusion
In a nut shell, The flaw of Nvidia control panel missing occurs due to numerous reasons like Graphics card driver issues, Windows update, Missing or incorrect Registry entries, corrupt Nvidia Control Panel and due to some general Windows errors and bugs which falls under the category of other errors.
Hence, by keeping all these factors in mind the above guide is designed for the better experience of Nvidia Graphic card users. Although, Method 4 and Method 5 mentioned above are the ultimate solutions to fix this flaw. But it is always recommended to follow the guide in ascending order.
Do share your views on this topic and let us know which method worked for you in the comment section below. Thank you for reading.


Leave a Reply