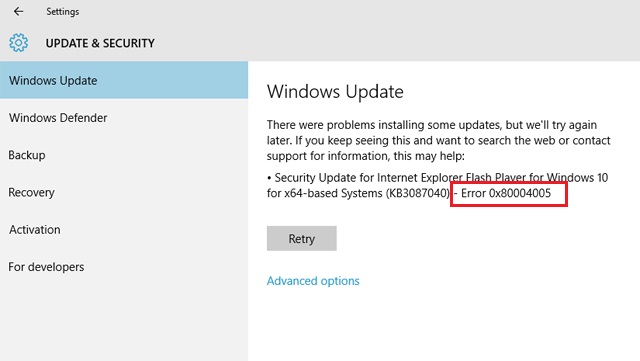
You often encounter the “Modern Setup Host has stopped working” error while updating your windows version. This issue arises when Windows 7, Windows 8, and Windows 8.1 are updated to Windows 10. Further, it is not at all possible to update versions like Windows XP and Windows Vista to the latest version of Windows 10. In order to achieve that, you need to do a clean install.
Windows 10 has gained popularity for many reasons; it is well known for its speed. Since the startup time taken by Windows 10 is faster than its previous versions. Another reason why Windows is famous among its users is its security. It inherits some of the security features from Windows 8 but has also added some new functionalities to it. Apart from this Windows 10 has many more exciting features in it which have attracted many user’s attention to it.
Therefore, by considering such advantages of Windows 10 you may upgrade your system and might have faced the “Modern Setup Host has stopped working” error. There are some reasons for this issue like wrong system configuration, the problem with the upgrade process, and other errors.
How to Fix Modern Setup Host Has Stopped Working Error
So, in this guide, we provide you with some of the methods to overcome this problem.
1. Check free Hard Drive Space
One of the reasons why you fail to update your Windows system is due to a shortage of free space on your system. It is very crucial to have free space on your system unless you will not able to update your Windows version. Media Creation Toolkit requires 8 GB for downloading the update to your PC. So, it is suggested to have free space greater than 8 GB. Since 8 GB is only required for updating your Windows. But, after that, you will require space for your data, application, and work. Hence, it is highly recommended to have 15 GB + free space for the smooth running of your system.
Here are some tips to free your device space.
- It is a good practice to delete unnecessary files and folders which are of no use. Hence, this will increase the speed of your system and will help you to free space for updating Windows.
- If you require data for the future and you do not want to delete it permanently, then you can save it in some external devices like USB or in the form of cloud storage (OneDrive, Google Drive, PCloud, and others) as your backup.
Read Also:
2. Prepare Windows PC for the Upgrade
Preparing Windows for an upgrade requires many system changes. It includes many different changes like disabling services not related to Microsoft, disabling startup programs, and changing regional Windows settings. Here in this guide, we describe the procedure for Windows 7, Windows 8, and Windows 8.1. Hence, this method will eliminate potential problems that occurred due to a conflict between different applications.
2.1. Disabling Services
Firstly, let us look at the disabling services which are not related to Microsoft. This method works with Windows 7, Windows 8, and Windows 8.1
Step 1: To begin with, hold the Windows logo and press R.
Step 2: Then, type MSConfig and hit Enter in order to open System Configuration.
Step 3: Go for Services.
Step 4: After that, click on “Hide all Microsoft services” which is at the bottom left corner.
Step 5: Afterward, at the bottom right, select Disable all.
Step 6: Lastly, select Apply and then OK to save your changes.
2.2. Disable All Startup Programs
In the second phase, let’s see how to disable all startup programs.
For Windows 7
Step 1: Firstly, hold the Windows logo followed by pressing the letter R.
Step 2: Then, open System Configuration by typing MSConfig and pressing Enter.
Step 3: Select the Startup tab.
Step 4: Followed by a click on Disable all at the bottom right corner.
Step 5: Hit Apply and then
Step 6: Finally, Restart your PC then Run a Windows upgrade.
For Windows 8 and Windows 8.1
Step 1: Firstly, hold the Windows logo followed by pressing the letter R.
Step 2: Then, open System Configuration by typing MSConfig and pressing Enter.
Step 3: Click on the Startup tab and then select the Open Task Manager.
Step 4: Click on the Startup bar again.
Step 5: After that, Disable all applications by right-clicking on the application and choose.
Step 6: Exit from Task Manager.
Step 6: Restart your Windows PC.
Step 7: Lastly, Run Windows upgrade.
2.3. Changing Regional Settings
In the third step, let us look at changing regional settings through Control Panel
For Windows 7 users:
Step 1: Firstly, hold the Windows logo followed by pressing the letter R.
Step 2: Followed by opening Control Panel by typing control panel and pressing
Step 3: Select View by Category.
Step 4: Then, choose the Clock, Language, and Region.
Step 5: After that, select Region and Language.
Step 6: Select the Location tab.
Step 7: Under the Current location, the category opts for the United States.
Step 8: Then, select Keyboards and Languages.
Step 9: Click on Change keyboards.
Step 10: Select General.
Step 11: Under the Default input language category, select English (United States).
Step 12: After that, click on Apply and then close Control Panel.
Step 13: Restart your Windows system.
Step 14: Lastly, Run Windows upgrade.
For Windows 8 and Windows 8.1 users:
Step 1: Firstly, hold the Windows logo followed by pressing the letter R.
Step 2: Followed by opening Control Panel by typing control panel and pressing
Step 3: Select View by Category.
Step 4: Then, choose the Clock, Language, and Region.
Step 5: Select Location.
Step 6: Then, under Home, the location chooses the United States.
Step 7: After that, Apply and then OK.
Step 8: Under the Clock, Language, and Region category, select Language to add another language.
Step 9: Hit Add a language.
Step 10: Select English and click Open.
Step 11: Then, select English (United States) and click Add.
Step 12: After that, under the language category, choose your previous Language and select Remove.
Step 13: Close Control Panel.
Step 14: Restart your Windows PC.
Step 15: Upgrade to Windows 10.
Step 16: The last and final step is to enable services, startup programs, and regional change settings.
3. Create a Bootable USB and Upgrade Your Machine to Windows 10
In this method, a bootable USB flash drive plays an important role. Using it, you need to upgrade your Windows to Windows 10. First of all, you need to create Windows 10 bootable USB using Rufus. Secondly, you need to reconfigure your BIOS or UEFI. Hence, it is easy for your system to boot from a USB flash drive. After that, boot your system and run the upgrade procedure.
4. Run Disk Cleanup and Delete $Windows. ~WS folder
This method requires running Disk Cleanup and delete $Windows. ~WS folder from your system partition. Disk cleanup is the tool that is used to clean your system by removing unnecessary files and folders from your system. This can boost your system’s speed and can help in improving the efficiency of your machine.
It is necessary to delete $Windows. ~WS folder. Whenever you upgrade your Windows to Windows 10 you will notice two hidden folders. These folders may either reside on C Drive or in the folder where you installed Windows. One of the hidden folders is $Windows. ~WS folder. Hence, make sure to delete it.
5. Resume Upgrading by Running setupprep.exe
This method is very useful in terms of time. Since, if you resume upgrading by running the setupprep.exe file, it will resume from the step where you left instead of following steps from the beginning. This method works with Windows 7, Windows 8, and Windows 8.1.
Follow the below-given steps.
Step 1: Firstly, by using the Media Creation Toolkit Run Windows upgrade through Windows.
Step 2: Then, after you get an error, close the Windows Update or Media Creation Tool.
Step 3: After that, hold the Windows logo and click the letter.
Step 4: Type C:\$Windows.~WS\Sources\Windows\sources\setupprep.exe and hit Enter to resume Windows upgrade.
Step 5: Wait until Windows completes its Upgrade.
6. Use DSIM to repair Windows
This method requires the help of DSIM (Deployment Image Serving and Management). DISM is a part of Windows ADK (Windows Assessment and Deployment Kit). This allows you to mount a Windows image file (install.wim) and perform image servicing like installing, uninstalling, configuring, and Windows update. This procedure is the same for Windows 7 to Windows 8.1.
7. Run System File Checker
System File Checker (SFC) helps in checking file corruption for Windows. It is a command-line utility that is integrated into Windows. If SFC finds issues with a file system, it will try to fix them. For this, you must be an administrator running a console session. It includes additional commands as SCANNOW. SCANNOW checks the integrity of all protected files and solves the issues of a problematic file.
9. Move the User Folder to the Default Location
It is often observed that some users move their folder from the default location to some other location in their system. This can create a problem for them. So, it is suggested that if you have moved your folder to another location, then move back to its original place C:\Users\YourUserProfile. After moving it you need to run an upgrade.
Read Also:
10. Clean install Window 10
If you are fed up with following all these steps, you can clean install Windows 10. But, before doing that, check whether your motherboard, brand name computer, or notebook supports Windows 10. Then, it is very important to make a list of applications that you are using.
So that you can install it later on your Windows 10 system. Last but not least, as a backup, you can store your important information in a USB flash drive, some external hard disk, and on-network shared storage or cloud storage.
Wrapping Up
To sum up, we have tried to cover solutions for all the root causes of this error. Do give us your feedback in the comment section below. Let us know which method was effective for you. Thank you for reading.


Leave a Reply